
This is Part 4 of a 4 part series on the hardware product development process. If you missed Part 1 (Ideation), Part 2 (Design) or Part 3 (Engineering), make sure to check them out.
Part 4: Validation
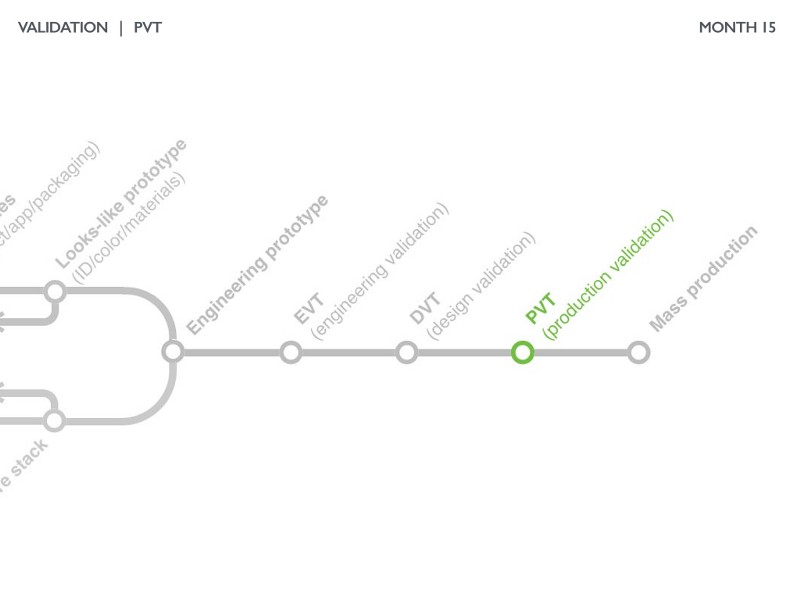
The validation phase is the most commonly standardized phase of product development. Validation is a progressively rigorous process to join the design and engineering development and ensure the product can be consistently manufactured at scale. As the validation phase moves from engineering prototype through engineering validation, design validation, and production validation, each phase (or “gate”) focuses on optimizing for mass production.
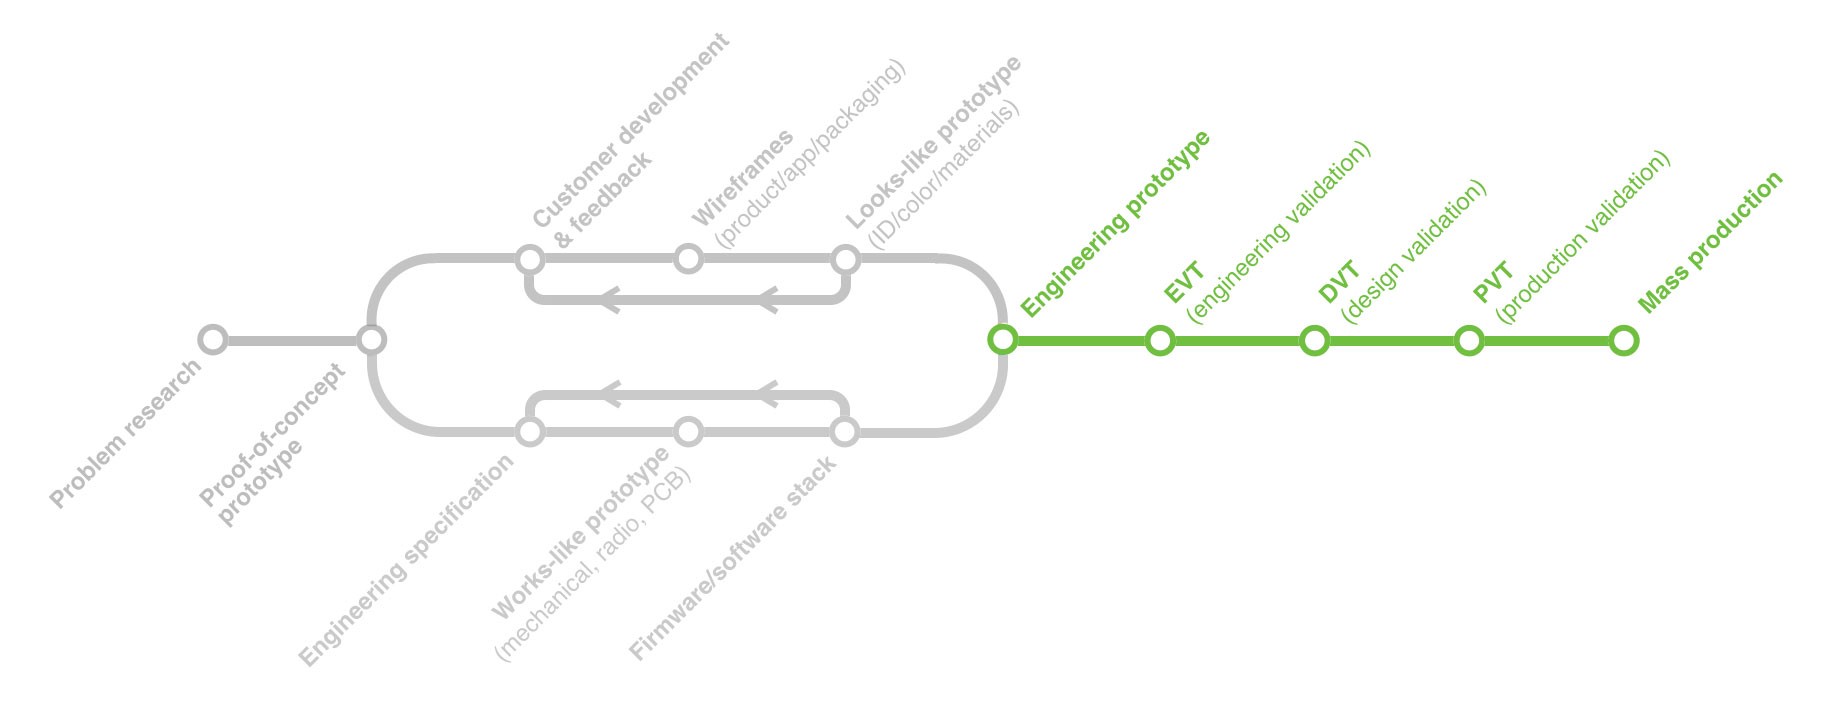
Engineering Prototype
The engineering prototype (commonly known as an “EP” or “proto”) is the first point in the development cycle where design and engineering meet.
You may remember the design and engineering phases each concluded with a prototype:
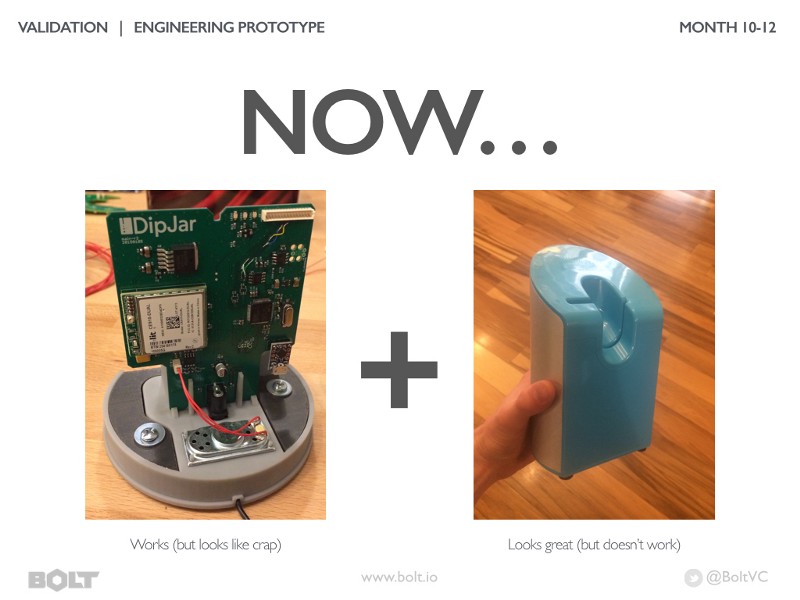
Merging these two prototypes can be challenging and often requires sacrifices on both sides. The engineering prototype process should conclude with:
- 5 or fewer units (often 1 is enough)
- No tooling and limited cost optimizations. It’s okay if unit cost is extremely high (often >10x of the production version)
- A “database” (or full list of parts and model files) that is ready to send to contract manufactures for quotes (RFQ)
Often this is the best time to raise money from investors. The EP represents the single largest step function in the product development process. For B2B/enterprise businesses: the EP is often good enough to begin selling. Because sales cycles tend to be longer, demoing an EP with a promise to deliver a production version in a few months is reasonable
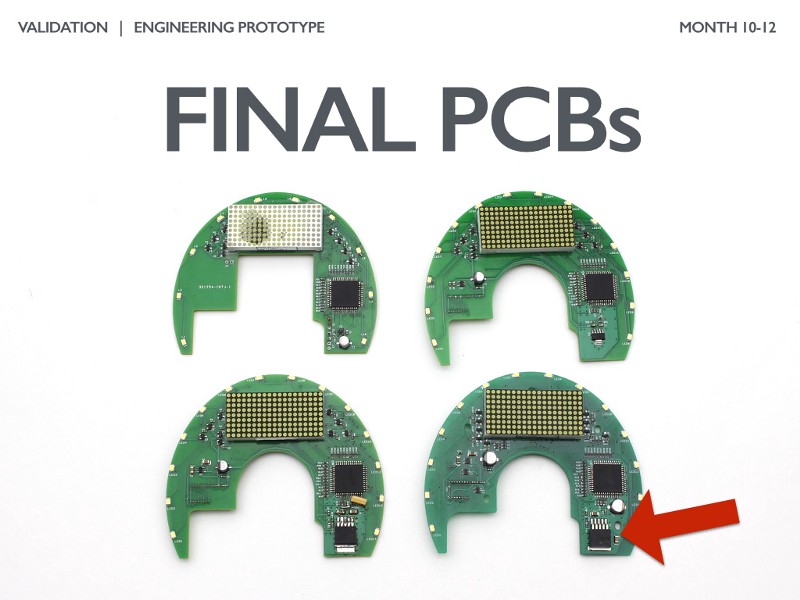
If your product has a PCB, it’s time to make final optimizations for performance and cost. You can see the final 4 iterations of the DipJar LED board which were an effort to reduce cost while maintaining reliability.
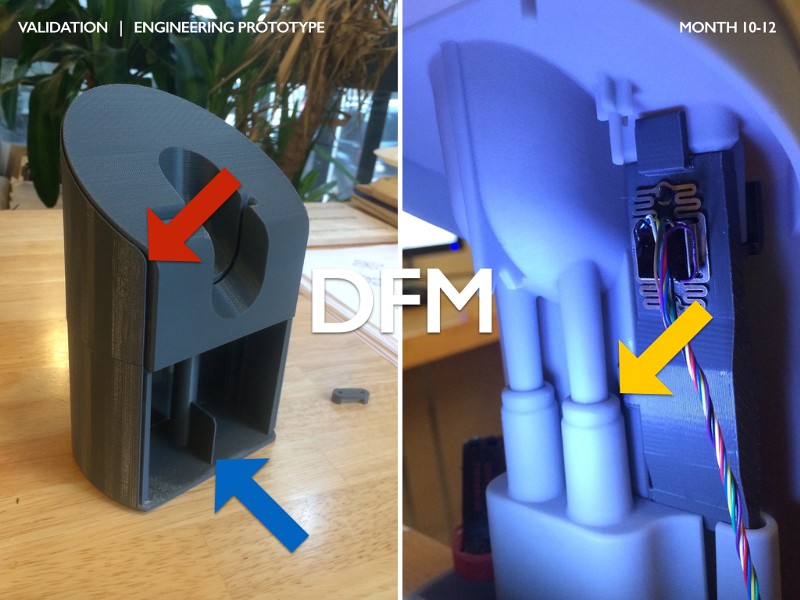
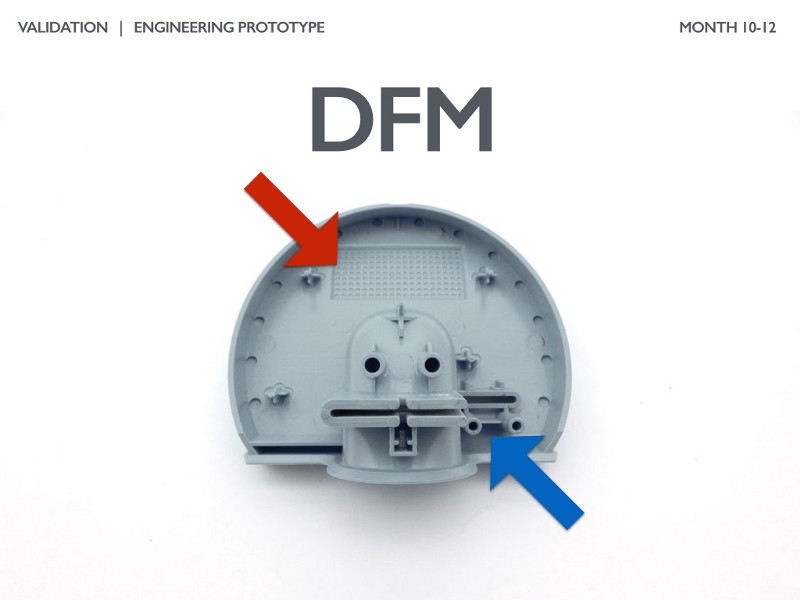
One of the most significant parts of the EP is refining the design of plastic and metal parts for high volume production, commonly known as DFM (design for manufacture). Plastics are broken into separate pieces for molding (red arrow), ribbing is added for strength and uniform wall thickness (blue arrow), and drafts/rounds added (yellow arrow).
More DFM! One of the trickiest parts of the DipJar design was getting the LED matrix to display clearly (as pointed out by the works-like prototype that had significant light bleed). This was solved with a special molding technique and an LED mask (red arrow). Screw bosses are also optimized for both molding and assembly (blue arrow).
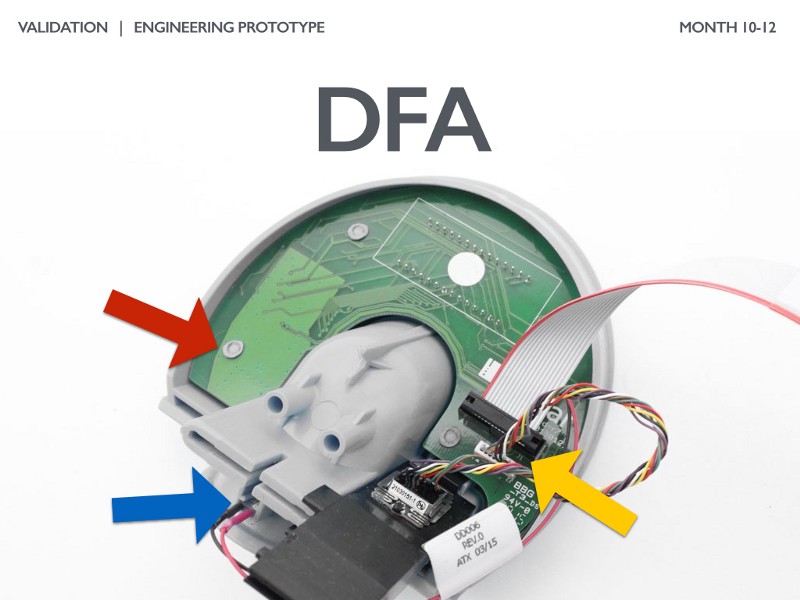
It’s also important to ensure each part can easily be assembled by a technician that’s not an engineer. This includes heat staking PCBs down (red arrow), headers and cable assemblies for board connections (yellow arrow), and tweaking the design so hands and tools can access each component (blue arrow).
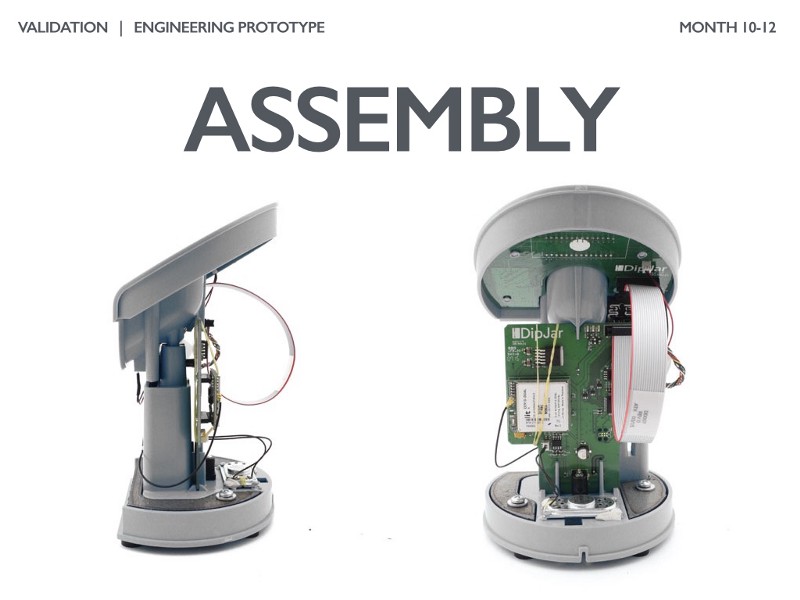
Once these pieces are optimized, engineers typically do several “dry run” assemblies to test assembly order, cable lengths, clearances, and fit/function. This is further optimized during the EVT build.
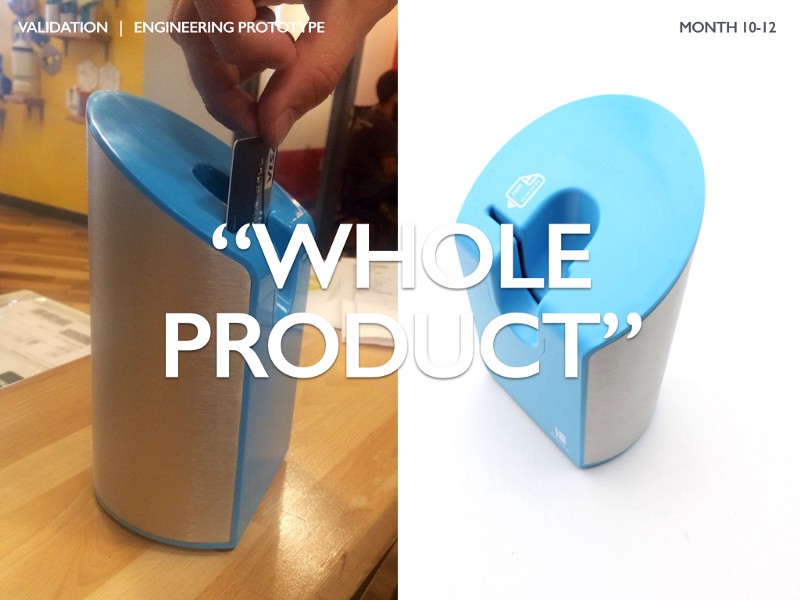
When everything is buttoned-up, we have a final EP. The picture on the left was a super exciting moment for the DipJar team: the very first fully automatic credit card tipped on the DipJar hardware and platform.
Engineering Validation Test
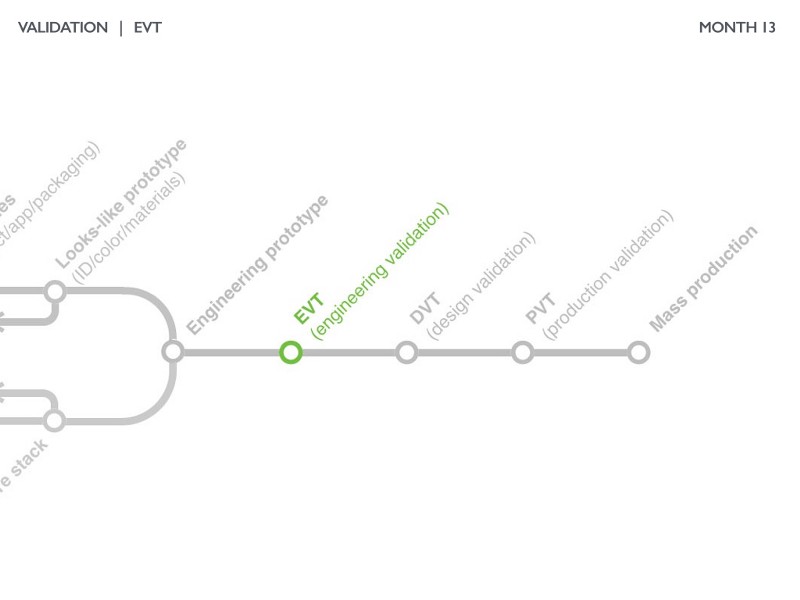
The engineering validation test (or EVT) is the final test of core product engineering. The question being asked during an EVT build is “does my product cover the functional requirements of my specification?” Common parameters for the first EVT build:
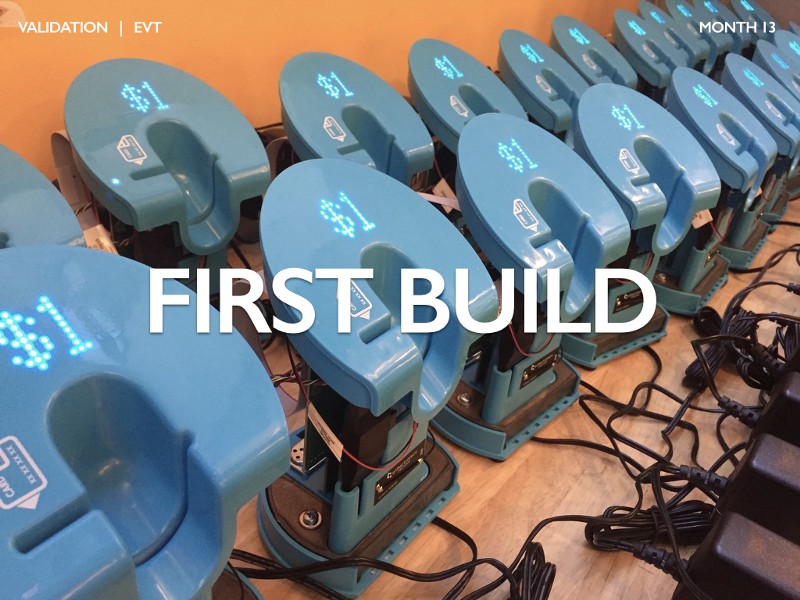
- Typically 20–50 units
- First time the contract manufacturer is assembling units (so many things often go wrong)
- Built on tooling that hasn’t been finalized (often called “first shots”) so it’s common to have flashing, incorrect coloring, no texture, or even significant issues with part fit)
- Basic tests including power, thermal, and EMI
It’s not uncommon to do a second EVT build after changes have been made.
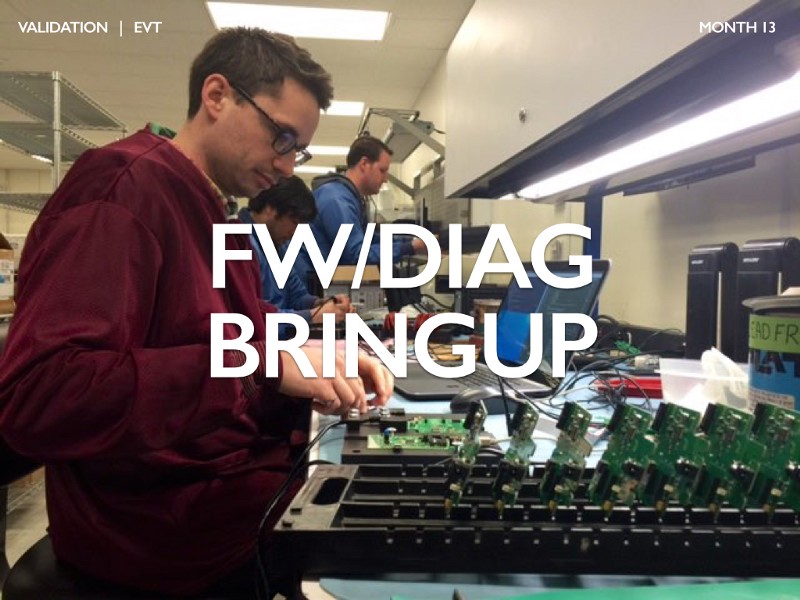
EVT is often the first time the board house brings up PCBs in a production setting (although usually with pre-production or test firmware). To ensure the CM is doing things according to spec, it’s very common to station at least one engineer with the CM during EVT builds.
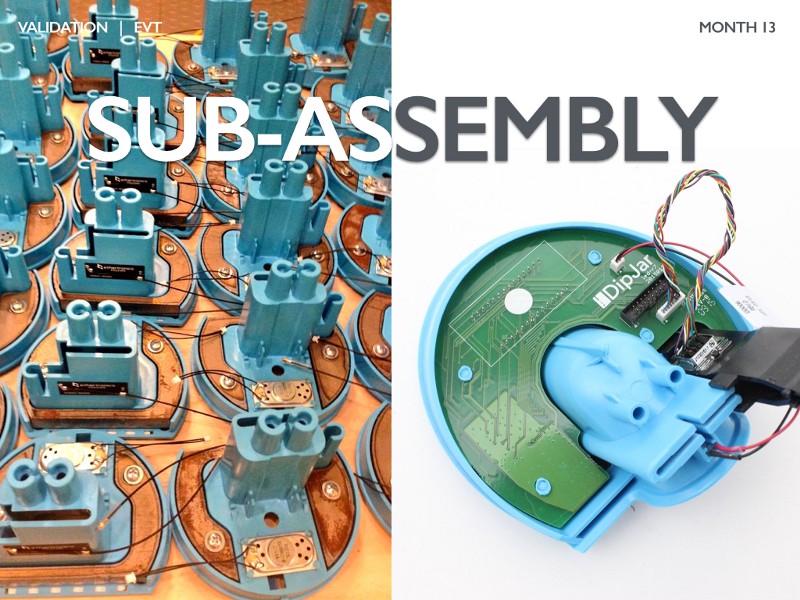
EVT units are built using production assembly procedures laid out in the EP stage. This includes building sub-assemblies of the product and then joining them. You can see 25 or so DipJar bases with speakers hot-staked, cellular antennas, and weights installed.
Once the sub-assemblies are completed and joined together, we see the first EVT production units being powered up for the first time.
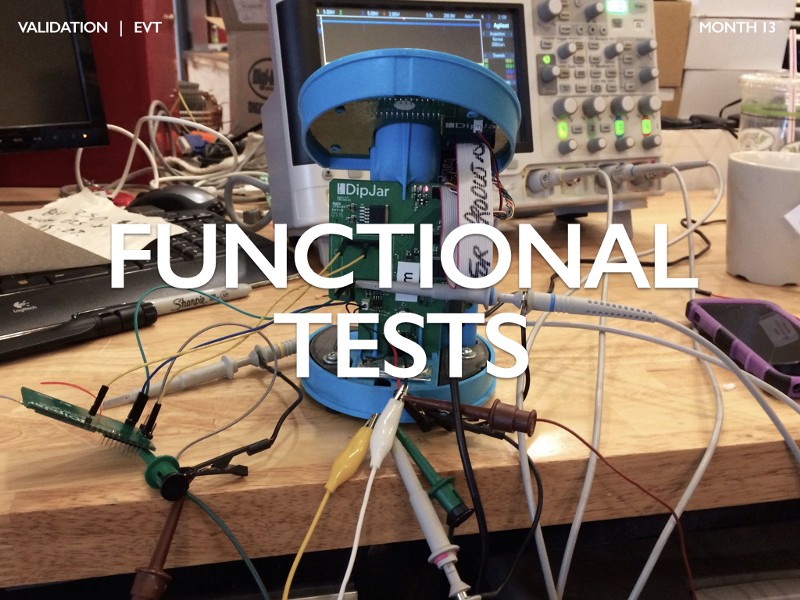
These EVT units are then put through the paces with a series of functional tests. Above, we see an EVT DipJar unit undergoing some basic power consumption tests. EVT units will also be tested to ensure they don’t overheat and can endure EMI/static build up. If major design flaws are uncovered, another EVT build is performed. Otherwise it’s on to validating the design.
Design Validation Test
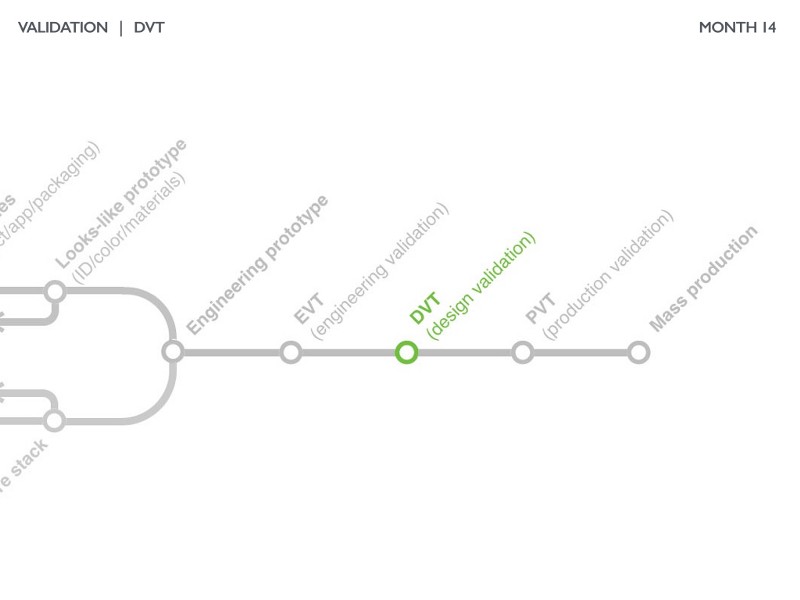
The design validation test (or DVT) is the first time the production process is the primary focus. The core question of the DVT build is “does the product meet all possible requirements including cosmetic and environmental?” Common parameters in the DVT build:
- Typically 50–200 units
- Final validation test before making sellable units
- Optimizing for yield (percentage of products off the assembly line that work) and time (number of units made per day)
- DVT units go through a large battery of tests
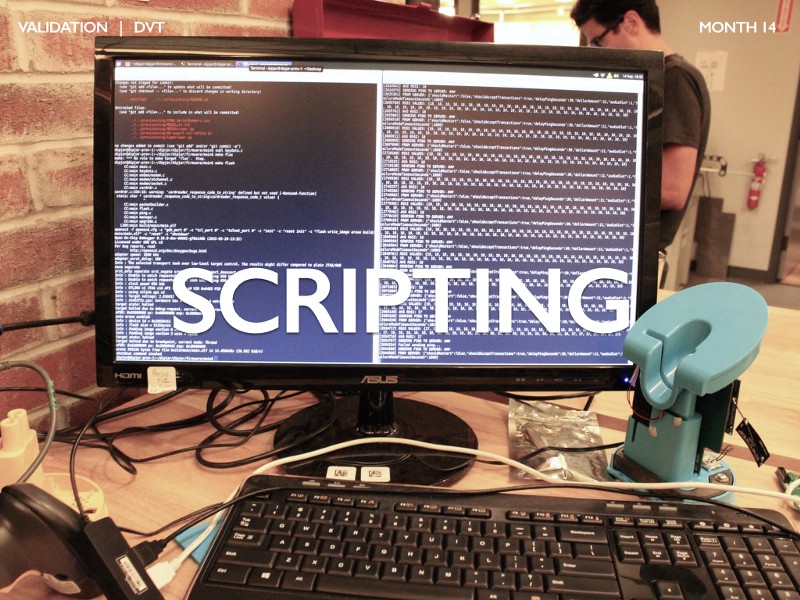
Because there are so many units being built, the DVT build focuses a lot on tools and techniques for getting units running consistently. If a production build environment isn’t already in place, it’s time to build one.
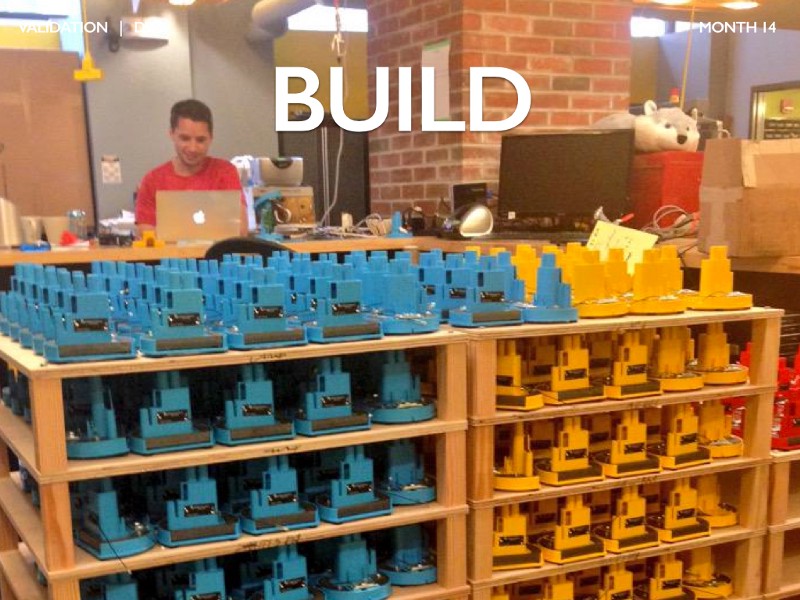
Notice that the assembly steps are the same as the EVT build but significantly larger quantity.
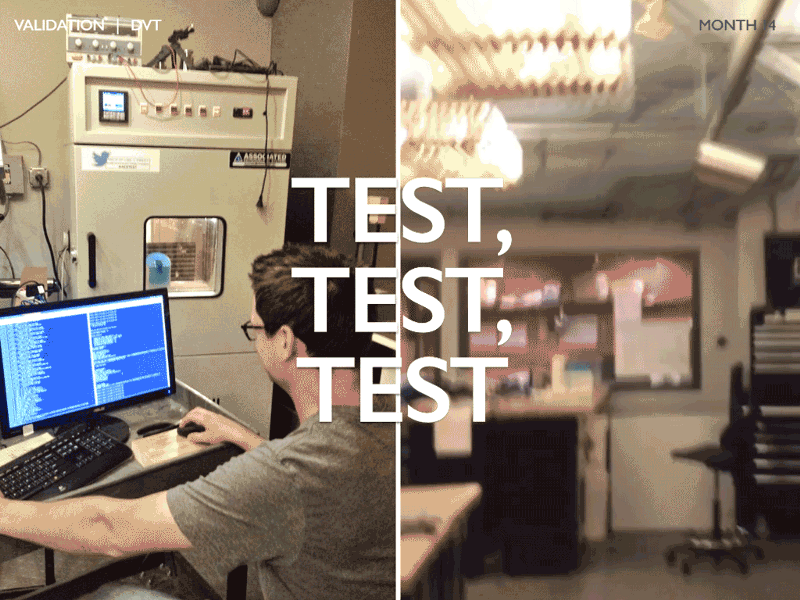
DVT units are then put through an extensive battery of tests. On the left we see a DVT DipJar unit in our AES environmental chamber in our Boston office (by the way, AES makes the BEST test chambers in the world). Some companies prefer to do drop tests at a mechanical testing laboratory, the DipJar team opted for a slightly less formal drop test (on the right).
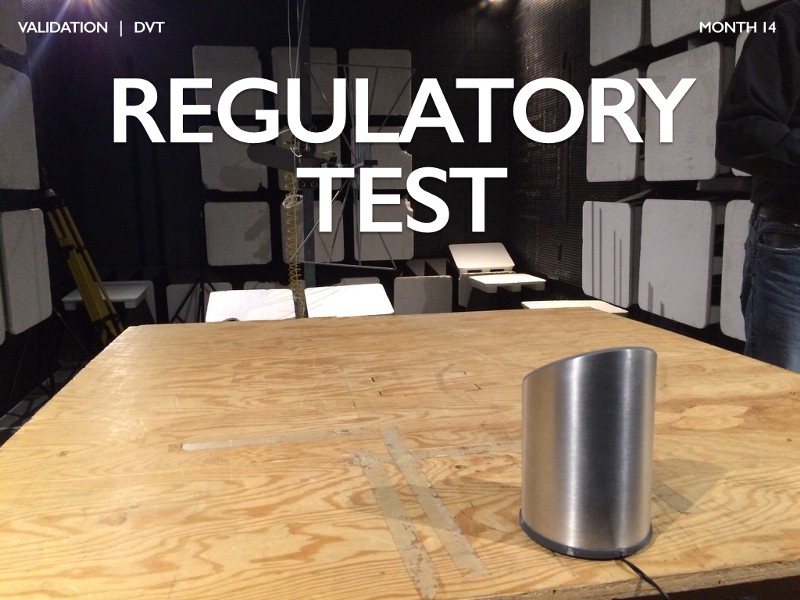
DVT units are typically used for regulatory testing. Above, a DipJar unit is going through FCC certification for active radiation of the cellular module.
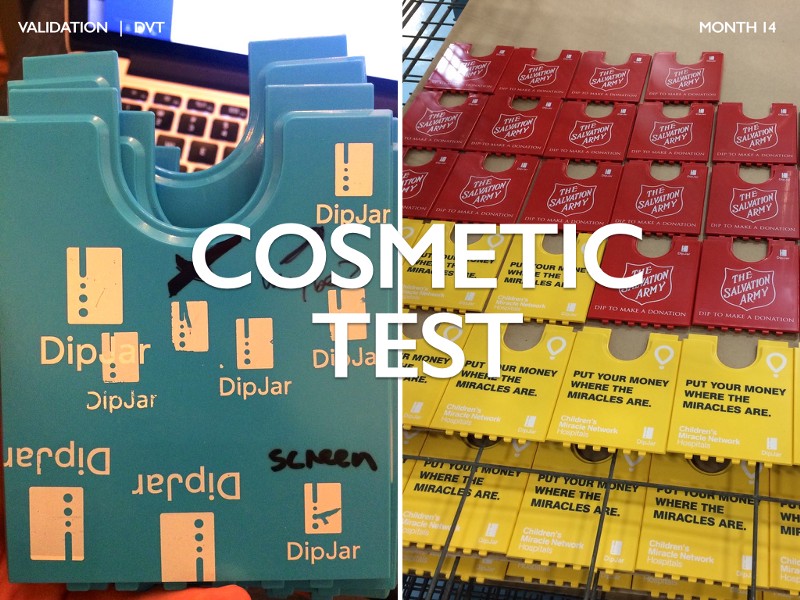
If your product has cosmetic features (like in-mold decoration, pad printing, plastic colors, or screen printing) DVT units are often the first units that are made using production cosmetic processes. DipJar has pad printed logos on the front and top face plates. DipJar also offers custom colors and printing for high-volume customers. On the left you can see the first test parts for the Salvation Army and The Children’s Miracle Network.
Production Validation Test
The production validation phase (or PVT) is the first official production run. PVT units are focused only on production and never yield changes to the product (unless something goes horribly wrong). Common procedures for the PVT run:
- Typically 500+ units (or 5–10% of first run)
- If all goes well, these units can be sold!
- No changes made to tooling
- Carefully analyzing metrics to predict Mass Production (yield, volume, time, rework time, etc)
- Full line setup and training procedures in place
- Final QA/QC processes
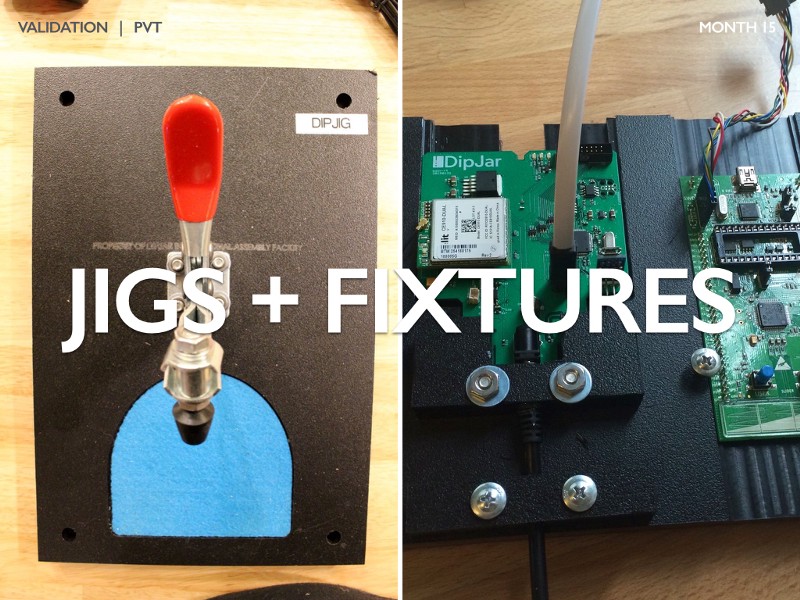
Jigs and fixtures are critical to ensure reliable assembly. Depending on the capabilities of your contract manufacturer, you sometimes need to design and build your own jigs and fixtures. The aptly-named “DipJig” on the left is for base plate assembly and the PCB programming fixture is on the right.
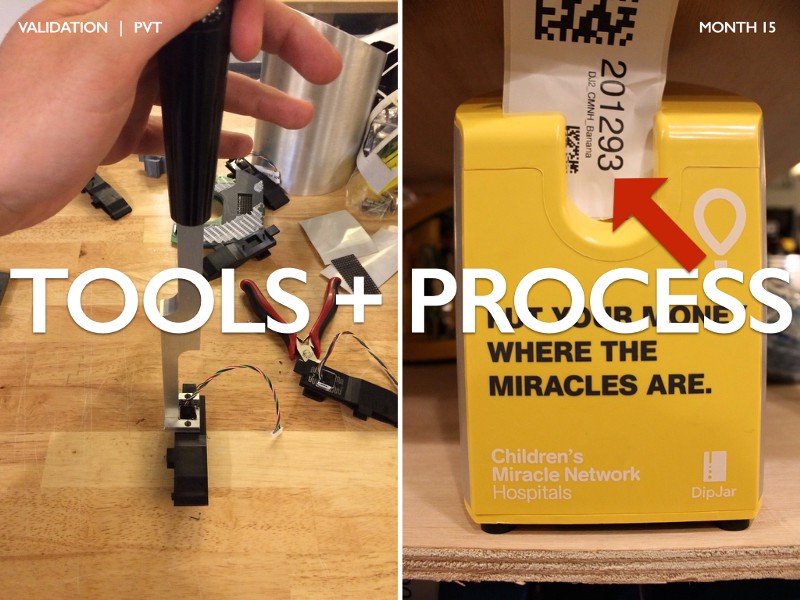
The PVT build is the final chance to tweak tools and processes. The tool on the left allows heat staking of the DipJar card reader head. The QR code on the right (red arrow) is a system to ensure serial numbers of various components are linked to the correct DipJar unit and box.
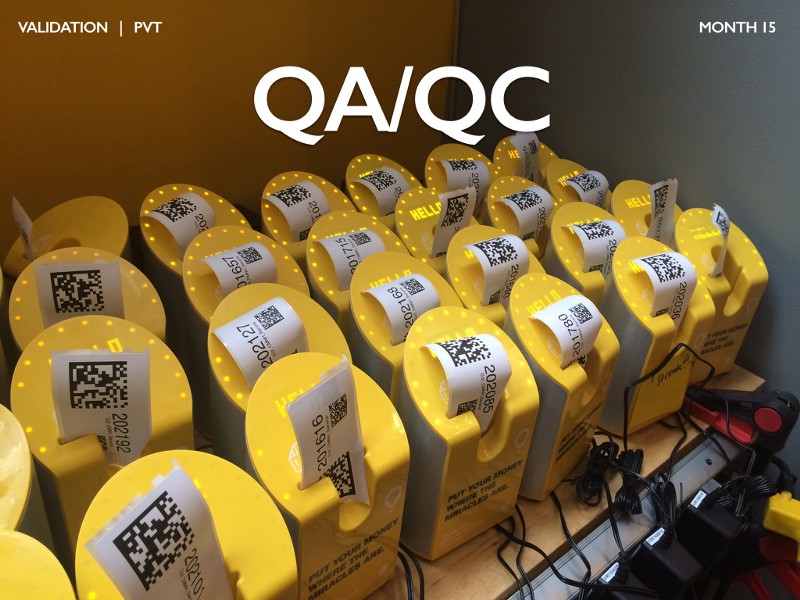
As PVT units come off the assembly line, quality assurance (QA) and quality control (QC) procedures must be developed and tested. Above we see a bunch of production units booting up for the first time, connecting to the network, and re-flashing themselves with production firmware. This automated process is highly effective “black box” testing for the electronics/firmware.
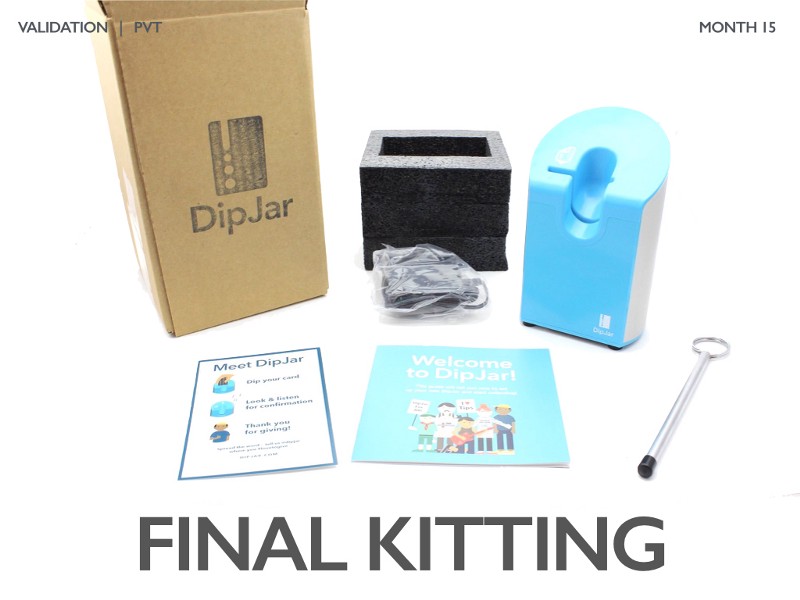
After units pass QC inspection, it’s time to match with accessories, put them in boxes, and prepare for shipping.
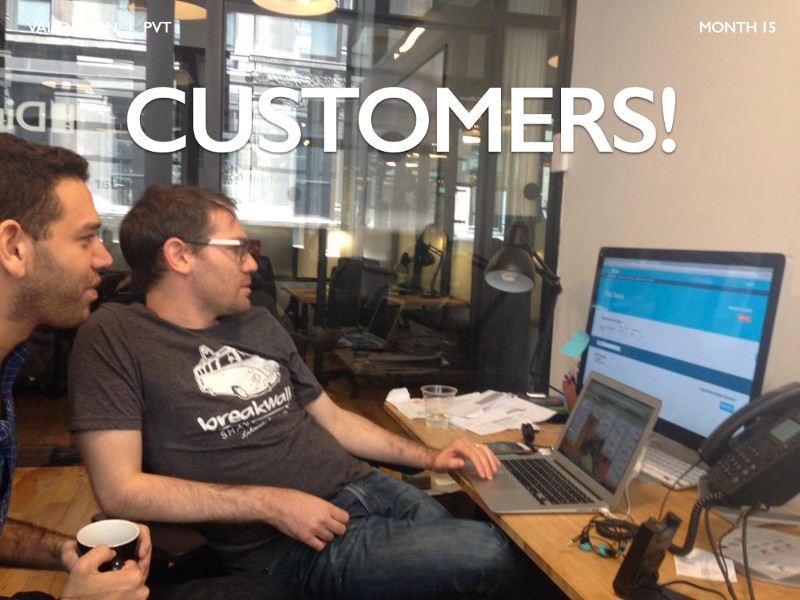
By far, the most exciting part of the PVT phase is watching customers use the first units. Above, Ryder and Jordan eagerly watch as their first production tip is processed.
Mass Production
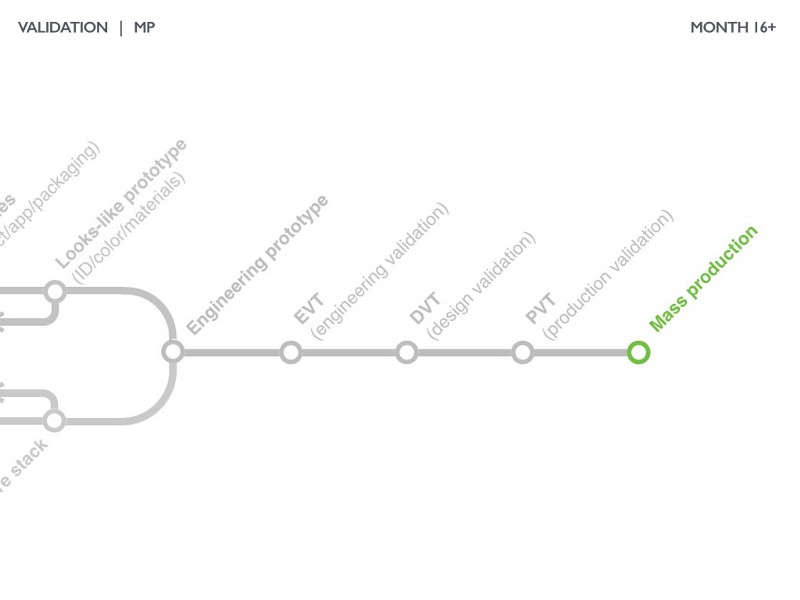
Mass production (MP or “ramp”) is the first full production run, often meeting the minimum order quantity (MOQ) of most CMs. Common parameters of first MP:
- Typically 5,000+ units (for consumer products)
- Failure and yield analysis on select units (1% is common)
- Begin to think about optimizing the supply chain for subsequent production runs
- Predict sales volume/demands

Watching tons and tons of parts come out of the mold machines is pretty amazing.

Seeing thousands of assembled units for the first time can be exceptionally gratifying. It’s really stunning how much space they can take up. The DipJar team built some custom shelves to maximize space utilization.
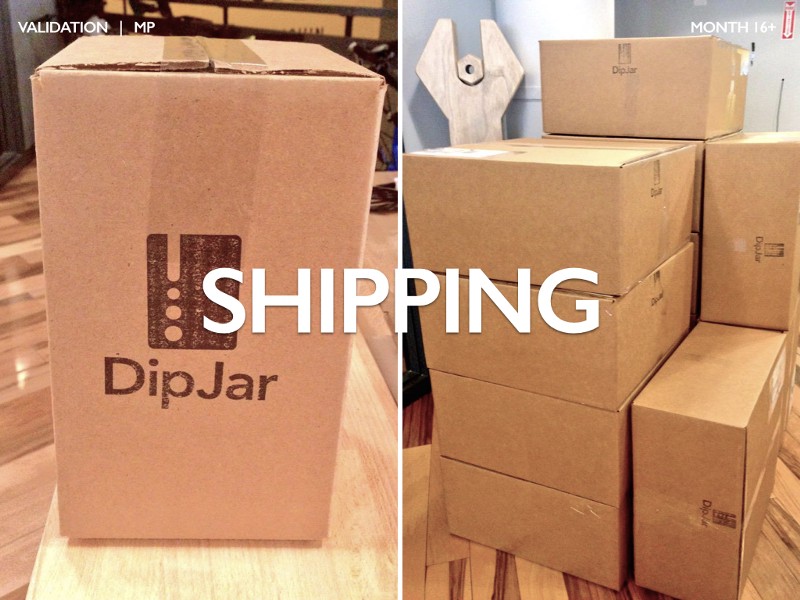
Final gift boxes (left) and master cartons (right) getting filled and shipped to customers.

Then the real work starts (marketing and distribution). Luckily this comes with a silver lining: watching customers use, love, and share the stories of how their product affected them. It’s also critical to start focusing on customer support as issues will arise.
Time to sleep! The second production run is closer than you think.
It’s common for the second production run to incorporate several changes, including:
- Cost reduction
- Yield/quality improvement
- Field failure analysis (ensure all units that fail make it back to your engineering team for diagnosis)
- Setup of a second line if necessary
That concludes this 4 part series on product development for hardware startups. Hopefully, this guide has illustrated that adding a bit of process isn’t a bad thing. Huge thanks to the DipJar team (especially Ryder and Jon) for allowing me to publish their product development process in excruciating detail. Recommend that your favorite coffee shop get a DipJar at www.dipjar.com.
Ben Einstein was one of the founders of Bolt. You can find him on LinkedIn.
Bolt invests at the intersection of the digital and physical world.