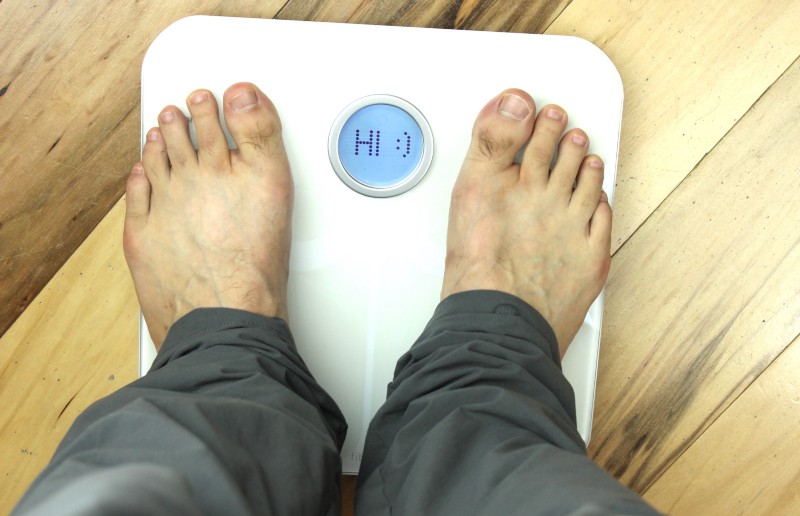
The Aria Smart Scale is built by Fitbit to augment its line of fitness trackers. Aria is a fitting name for this product as it complements the rest of the Fitbit line, but stands apart in function and form. While the Aria scale is very different from Fitbit’s main line of products, their engineers have done an excellent job on design and engineering. From the design for assembly (DFA) to the component selection, the Aria’s hardware tells a story of a team that did product development right. Looking inside, I see a no-nonsense design that takes advantage of off-the-shelf components and does not compromise on aesthetics or cost.
Base plate keeps assembly simple
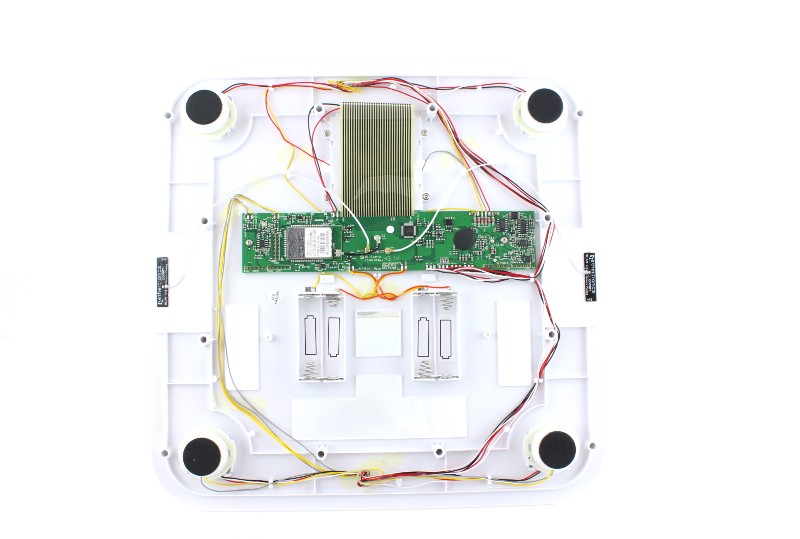
The Aria scale is assembled around a primary base plate. In this case, the base plate is a large piece of plastic that every sensor, wire, and component is mounted to. Each component can be tested before it is assembled and once all of the complicated parts are contained in this one assembly, it is possible to do a full check of the system before putting on the cover. This base plate is almost completely hidden from view, which means that the engineers had a lot of freedom to design in cost-efficient features to make assembly.
Molded-in structural components avoid fasteners
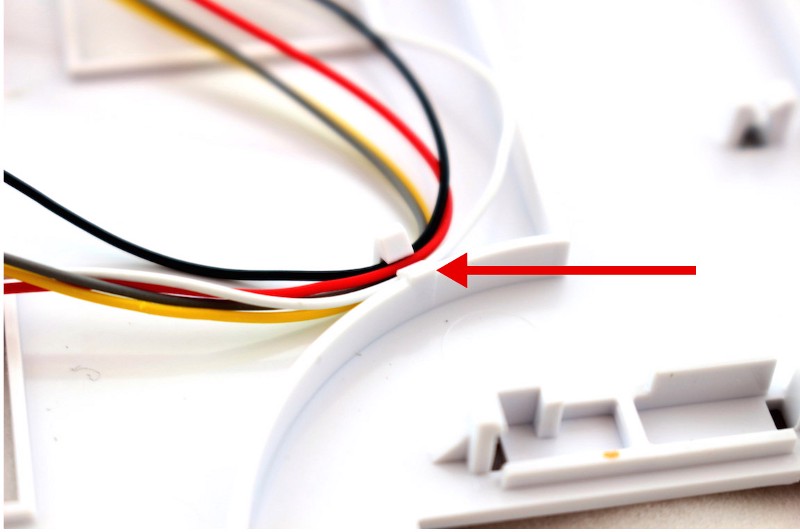
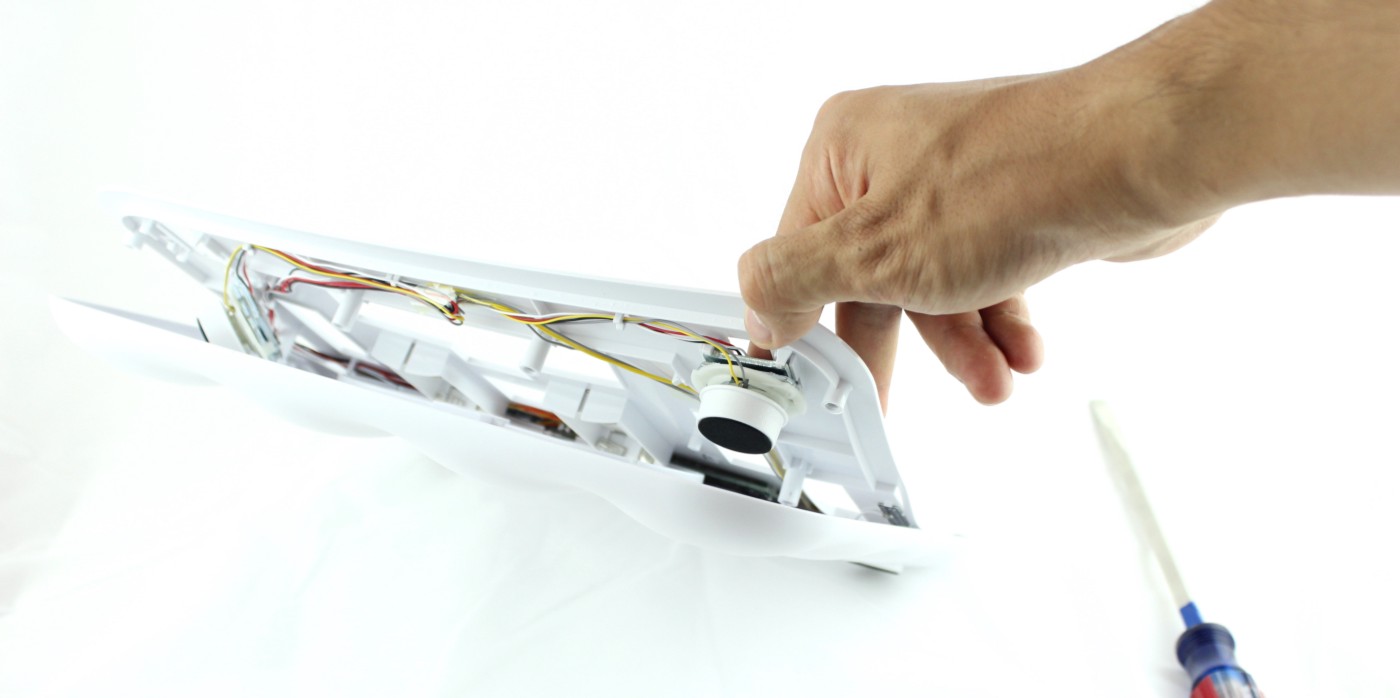
Since the base plate is almost completely hidden, it is possible to use features that are not used on cosmetic surfaces. The most prominent are the snaps that are used to hold the wires in place. This kind of snap allows for a straight-pull injection mold without any actions, which can be significantly cheaper than a mold with actions. Since the snaps do not require an action, they can be placed anywhere on the tool, making them convenient for wire routing anywhere on the base plate.

There are also quite a few thick ribs and bosses on the part. If the thickness of the rib and the part that it is supporting are similar, when the part cools it will warp and create sink. Since nobody can see this part, there are many ribs across the entire plate that are 80%-100% of the thickness of the surface they are supporting (typical ribs are 50%).
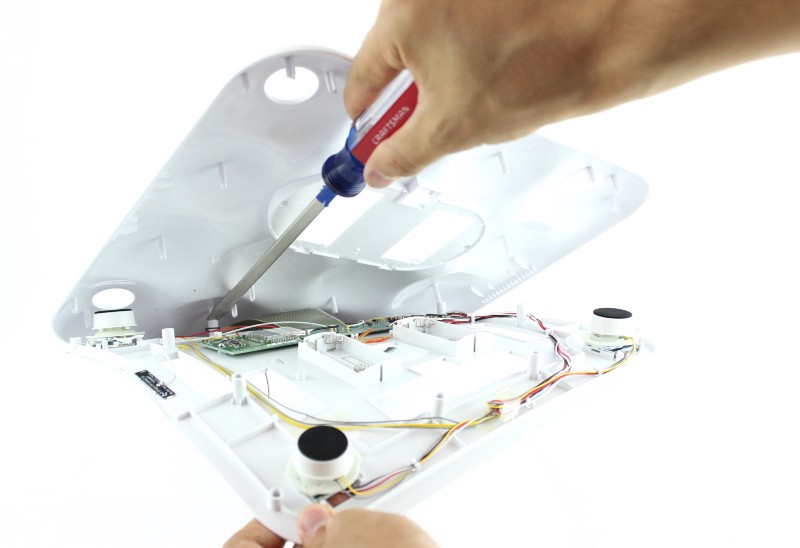
It’s a good thing these bosses can be thick. They press-fit with cross-shaped pegs on the cover for the bottom of the scale. The press-fit creates a high amount of stress on the bosses, but allows the two parts to be assembled without fasteners. This saves huge amounts of time/cost and leaves the bottom surface of the scale free of any holes from screws. Since crosses are cored out and the plastic opposite the crosses is also textured, there is little risk of any sink marks being noticed.
Off-the-shelf chips and modules shorten development time
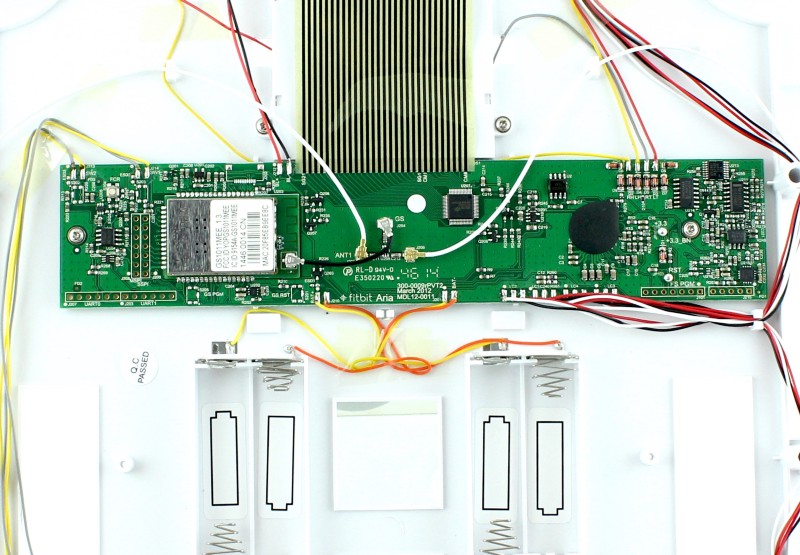
The major components on the Aria PCB are a GainSpan GS1011MEE low-power wifi module, a Holtek HT16C23 LCD driver, Ethertronics 1000817 and a generic, wire-bonded strain gauge driver, which is hidden under the large blob of black epoxy. Finding and using off-the-shelf products that do exactly what you need is a great practice for getting your prototype to production quickly. For example, GS1011MEE is an FCC-certified module, which means that it has to pass a lot of expensive and potentially slow tests that you can see in the test report for the module. The Aria scale has its own FCC ID, but you can see in its report that it piggybacks a lot of its tests from the modular certification of the Gainspan part. To give you an idea of the difference, the Fitbit report is 20 pages long, while the Gainspan module report is 131 pages long.
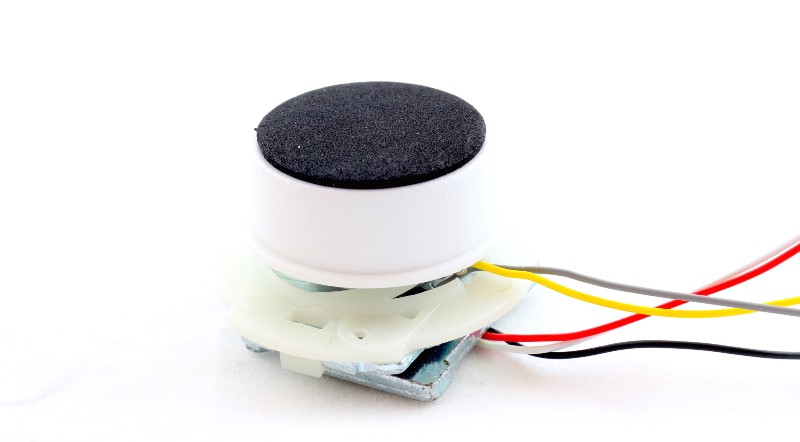
This load cell is the primary sensing component of the scale. A load cell is piece of metal with a strain gauge attached to it. As the metal bends under the weight of the user, the conductor in the strain gauge is stretched, which changes the resistance a tiny amount- on the order of 0.1% of the resistance. This is incredibly hard to measure, especially because the entire range of weights need to be measured is within that 0.1% change. This is why using an off-the-shelf strain gauge reader saves a lot of time- something we have seen/implemented many times at Bolt.
There is more interesting evidence that points at the entire weight measuring system being off-the-shelf. The plastic feet on the load cell have a texture not used anywhere else on the product and the tint of the plastic on the feet is not color matched to the rest of the product. Paired with the strain gage chip, the feet show that the engineering team focused on optimizing for time-to-market by using off-the-shelf components wherever possible.
Custom functionality costs board space
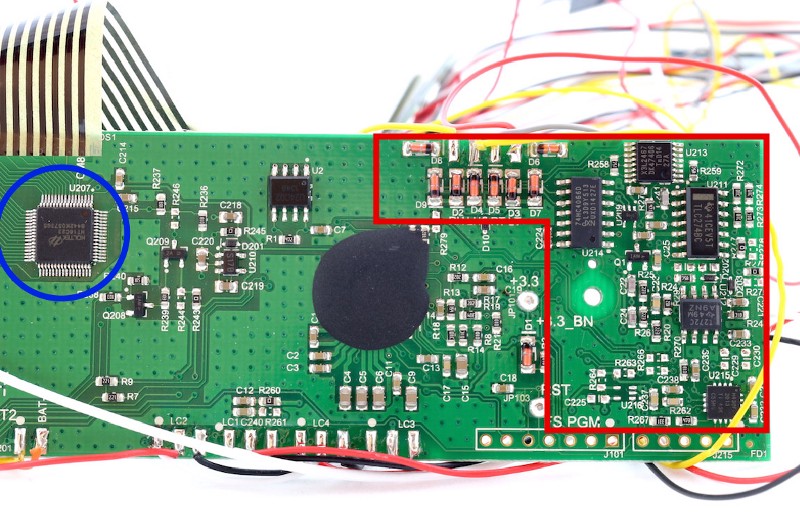
Unlike the single-chip solutions for strain gauges and wifi, the analog electronics for measuring body composition require a lot more board space and part placements. What you see here is a four-point impedance sensing circuit which is typical of high-precision impedance measurements. As you can see, the custom solution (in red) takes a lot more parts and a lot more routine than something like the LCD driver chip (blue), or the strain gauge measurement chip (black blob). It is also more expensive: the cost for all the chips in the body composition measuring circuit cost ~$2.90 while the cost of the Holtek LCD driver chips is a measly $0.10.
Transparent electrodes
From a materials standpoint, the implementation of body fat measurement is by far the most innovative part of the scale. Most body scales measure the user’s body fat percentage by applying a tiny amount of current through your feet and measuring the voltage that is generated. This requires an electrical connection to your body, which is why scales that measure body fat percentage have a bunch of cold metal pads protruding from the surface.
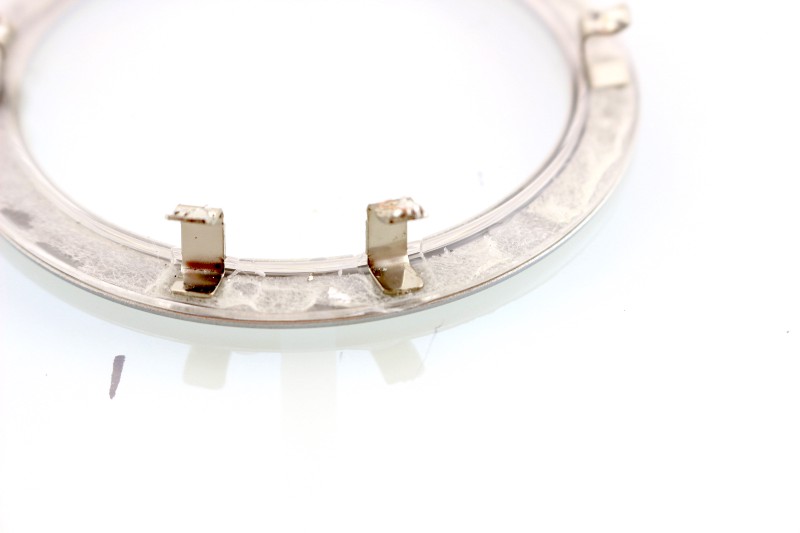
On the Aria, there aren’t typical electrodes. Unlike other scales, the Aria uses transparent Indium Titanium Oxide (ITO) electrodes. ITO is commonly used for making LED displays and microfluidic devices, so it is exciting to see it here. These electrodes are deposited onto the top of the glass and then attached by small strips of metal that are hidden under the bezel of the display. This was originally patented by Steven Petrucelli of Measurement Specialties. It does not look like the patent has been granted yet, but it is referenced in the patent that covers the Aria scale, so it is reasonable to expect that Fitbit is using the same system and is paying for the rights to do so.
Where do we stand? Final weigh in
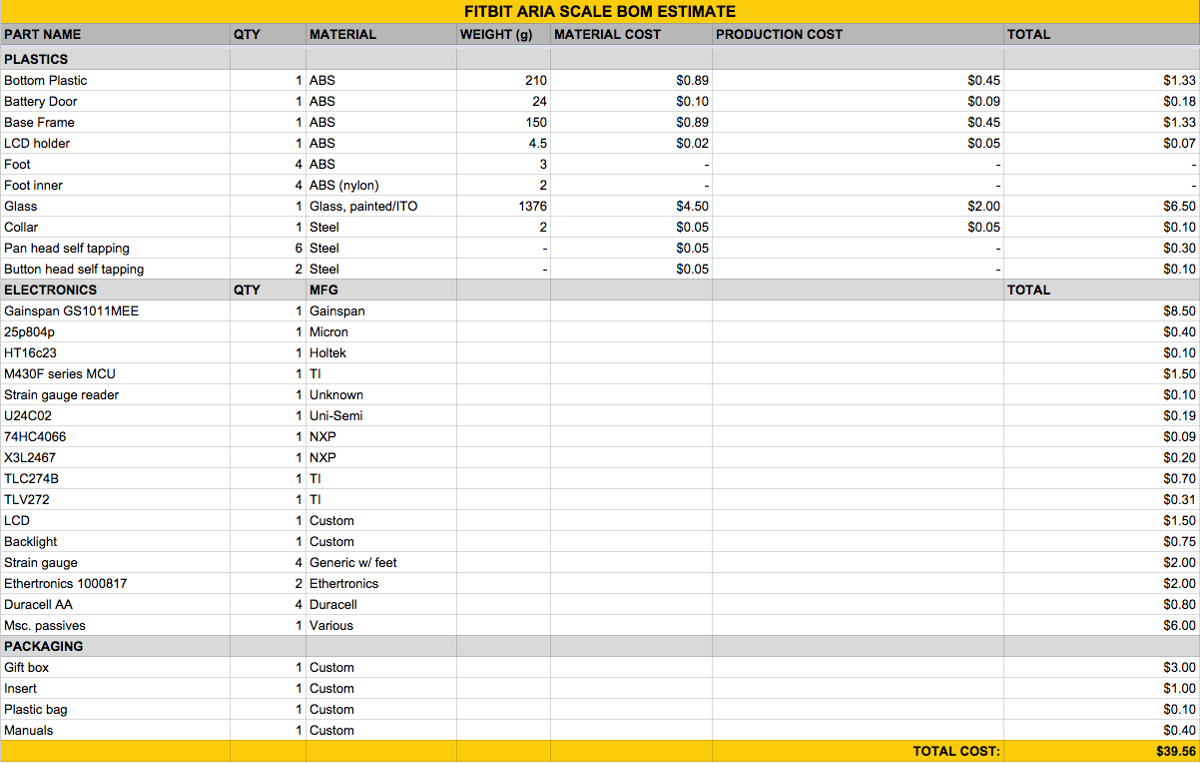
The Aria scale succeeds in both industrial design and in engineering — a rare feat from the products we’ve torn down at Bolt. The seamless glass surface of the scale is unmarred by stainless steel electrodes and has a clean, modern look instead of the industrial stainless-and-glass construction of its competitors. This design requires the use of an unusual electrode material and atypical manufacturing processes but the results are worth it. At the same time the construction costs of the scale were reduced by including wire routing features and minimizing the number of screws in the assembly. I estimate that the BOM (excluding COGS items such as labor or freight) is approximately $39.56. I applaud the Fitbit team on an excellent product!

Bolt invests at the intersection of the digital and physical world.