
This is Part 3 of a 4 part series on the hardware product development process. If you missed Part 1 (Ideation) or Part 2 (Design), make sure to check them out. Head over to Part 4 (Validation) if that’s more relevant to you.
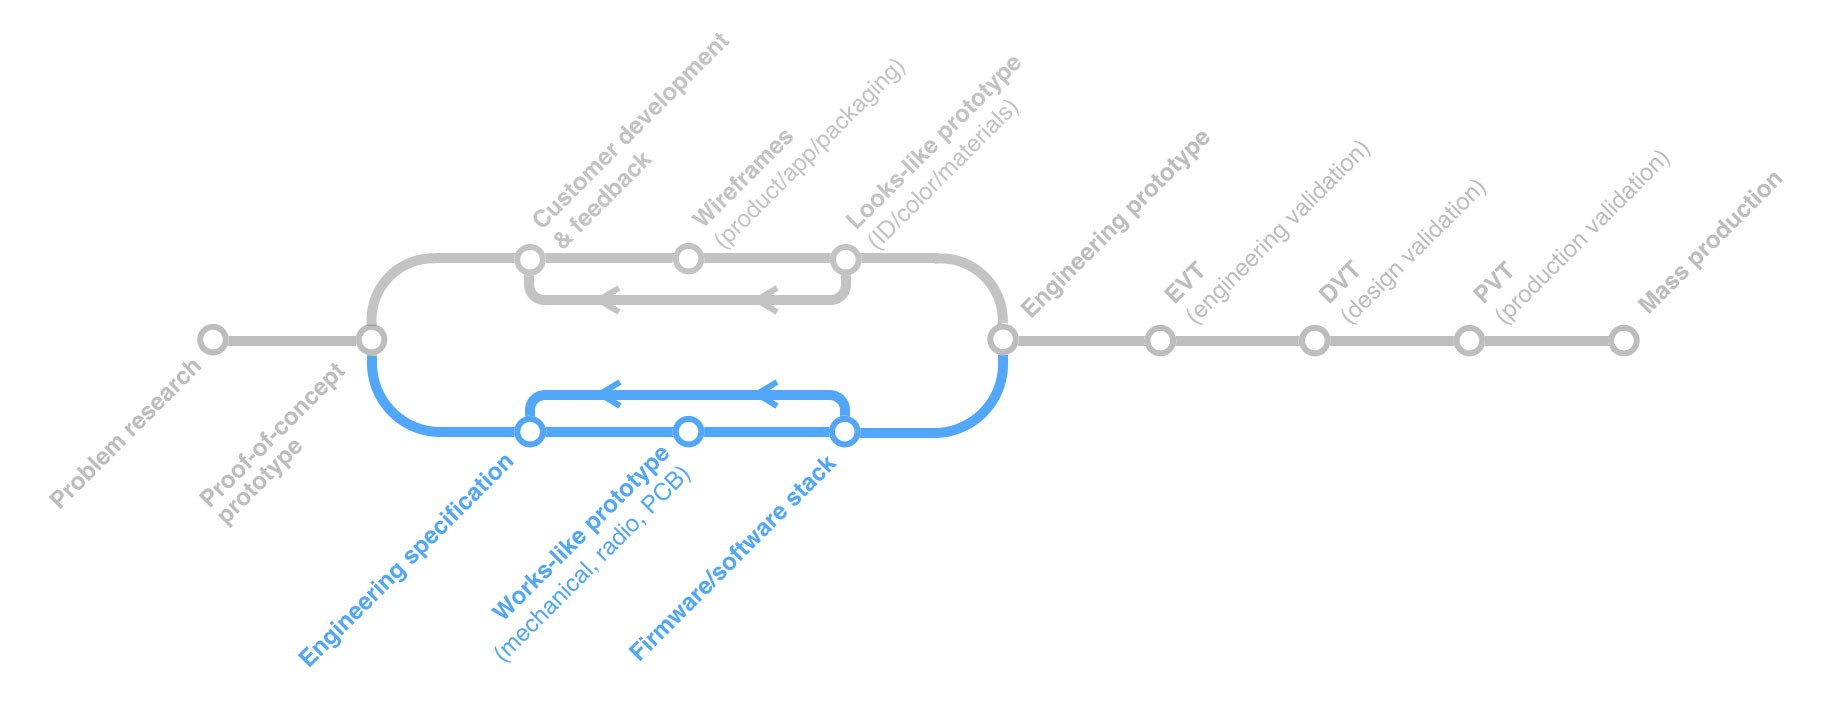
Part 3: Engineering
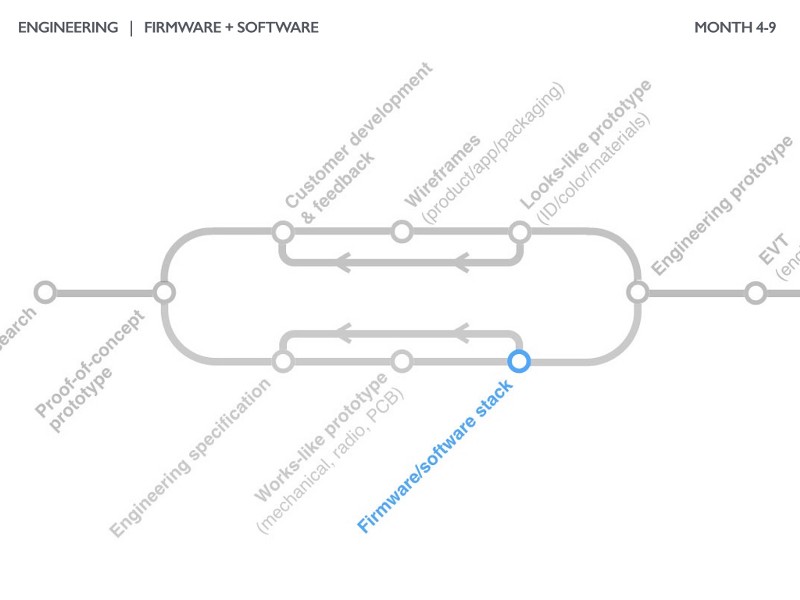
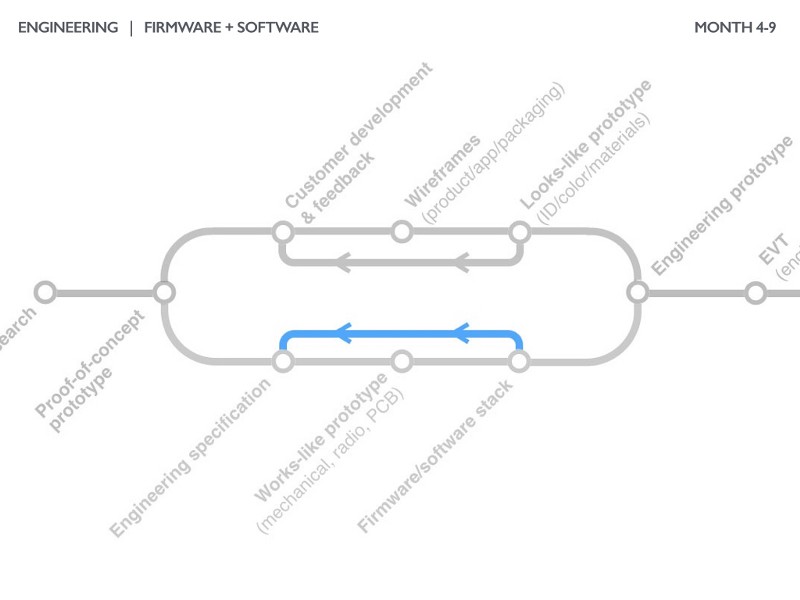
Each step in the engineering phase (specification, works-like prototype, and firmware/software) is designed to ensure the product will reliably function and be cost effective to manufacture. By the end of the process, startups are left with a prototype that functions well but doesn’t have a good user experience and often isn’t very presentable. The engineering phase is nearly always done simultaneously with the design phase.
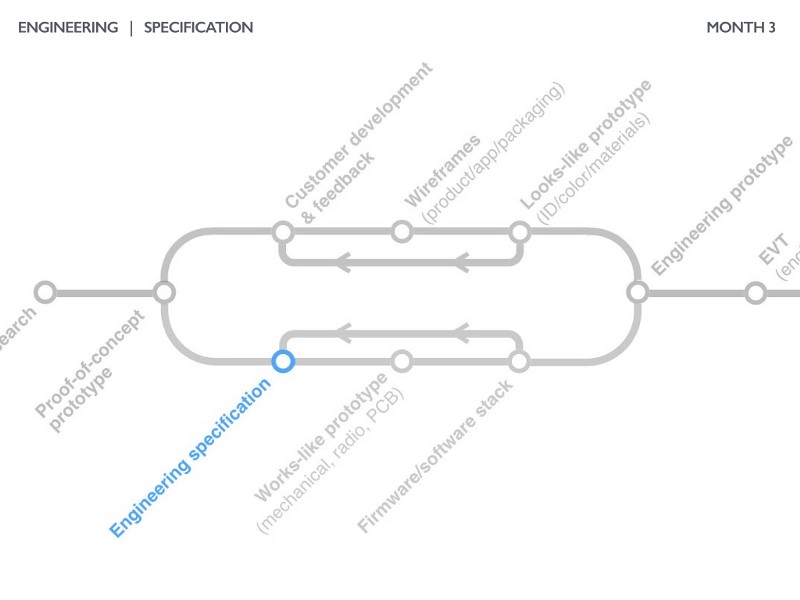
Engineering Specification
One of the best indications of a well-engineered product is the rigor of the engineering specification document.
The engineering specification (or product design/requirements specification, often “spec”) is a critical document in the creation of every hardware product. While many startups believe documentation of any kind is overhead and unnecessary I’ve seen companies waste months and tens of thousands of dollars by not thinking through their spec rigorously.
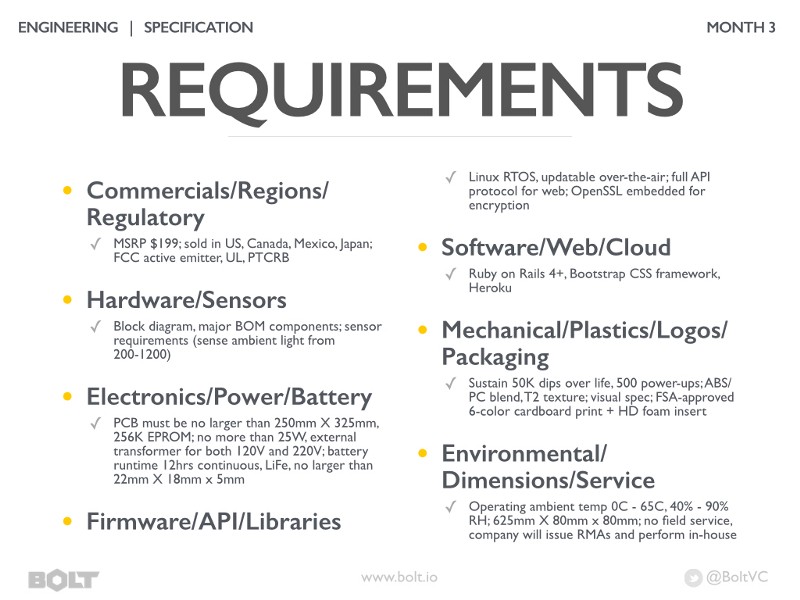
Most products can be defined by seven core areas:
- Commercials and regulatory — countries of sale and MSRP, regulatory requirements, acceptable margin structure, timeline for product refresh (EOL)
- Hardware and sensors — diagram of entire hardware system, list of major BOM components, requirements of sensors
- Electronics — size of PCB, amount of memory, requirements of processor(s) and radio(s), size/life/chemistry of battery
- Firmware and libraries — operating system or embedded environment used by firmware, API specification, external libraries required
- Software and web — software stack and environment for development, server infrastructure requirements, SCM plans, error states
- Durability and packaging — lifetime requirements, cycles of various sub-systems, packaging requirements
- Environmental and service — operating temperatures and humidities, descriptions of serviceability and returns process, customer support system and tolerances
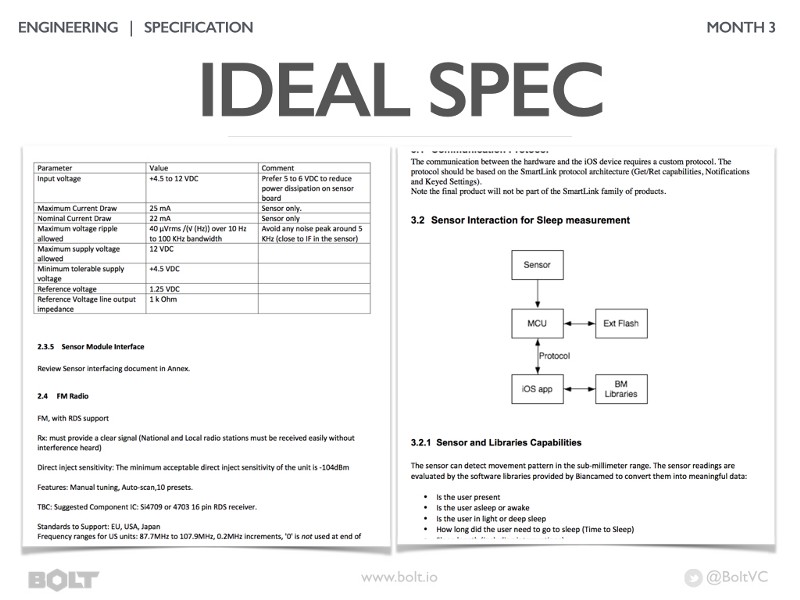
Many big companies depend on mountains of documentation. This documentation is usually painstakingly authored and full of tables/charts with every possible detail. Even though this is necessary for certain types of products, this is a lot of overhead for most startups.
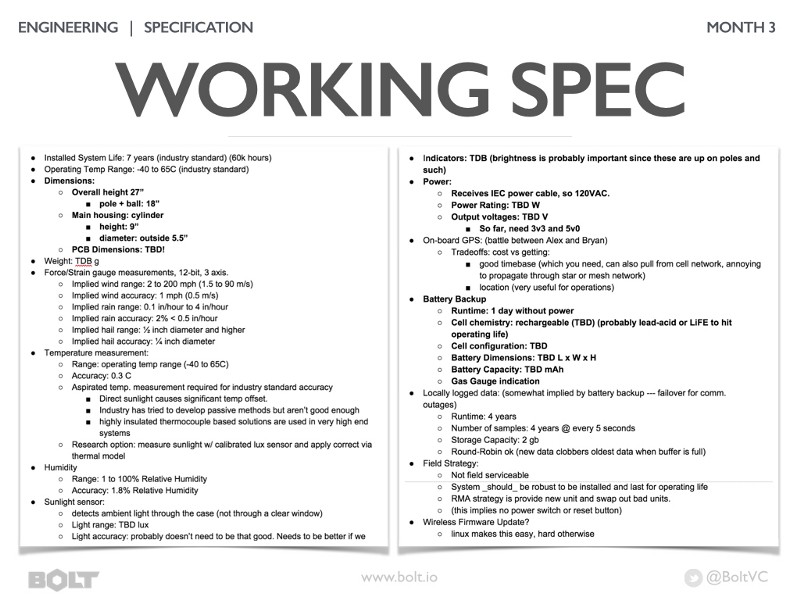
I’ve found it far more effective to rely on a “working spec.” This is usually a shared outline (Google Drive works well) broken down by requirement groups. Many startups constantly update this document as they learn more about their product requirements. It’s a good idea to think through all possible product requirements and mark the ones you don’t know but need to figure out with a bold TBD.
Works-like Prototype
Once there’s a good amount of information documented in the spec, it’s time to begin addressing each requirement with solutions. This culminates in a prototype that often looks quite different from the final product but reliably functions and meets each requirement of the specification.
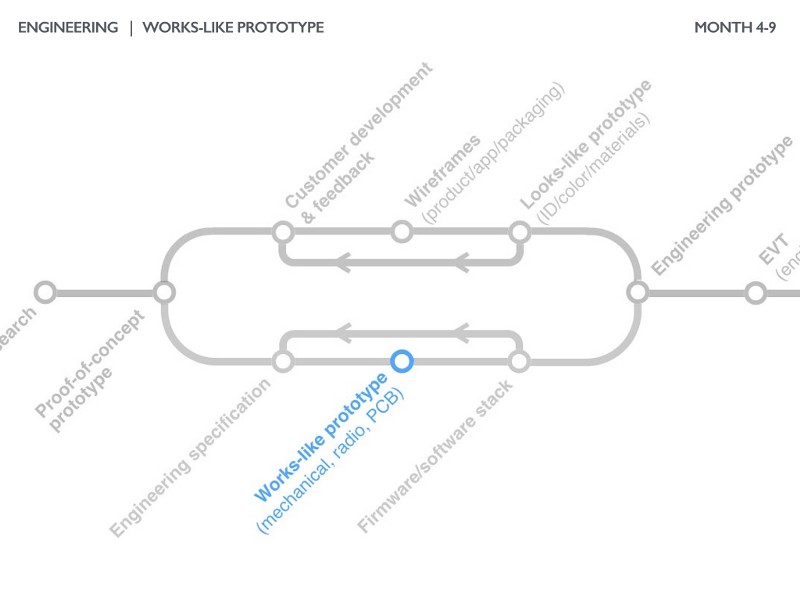
The works-like prototype is built to answer a large number of questions uncovered by developing the engineering requirements: core function, component selection, PCB, mechanics, feel, and assembly.
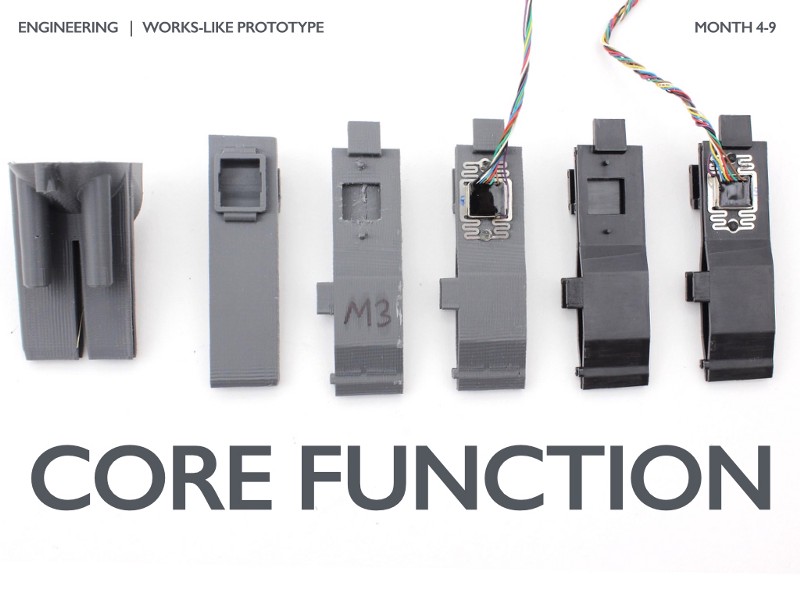
Most products have a “core function” that is by far the most important system to ensure reliable use. At it’s core, DipJar reads credit cards and processes transactions. You can see DipJar’s card reader bracket evolve as various designs were tested. Moving from left to right, starting with a very rough 3D printed bracket to the final molded prototype. The encrypted read head itself was also changed as a different mounting option was found to more consistently read magnetic stripes.
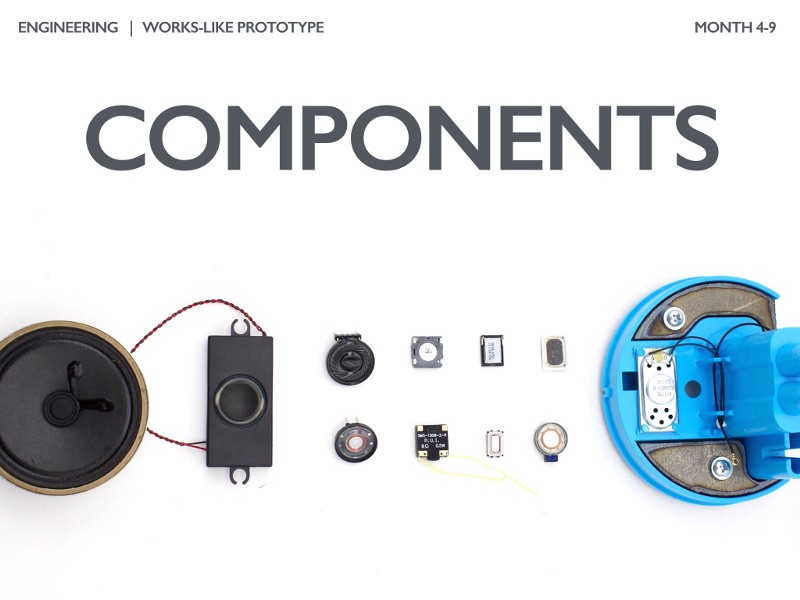
Selecting components can take several months of review and qualification (testing) to ensure they will meet basic functional and durability requirements. In the image above you can see the plethora of speaker modules DipJar tested to get the right combination of price, sound quality, durability, and supplier availability/lead time.
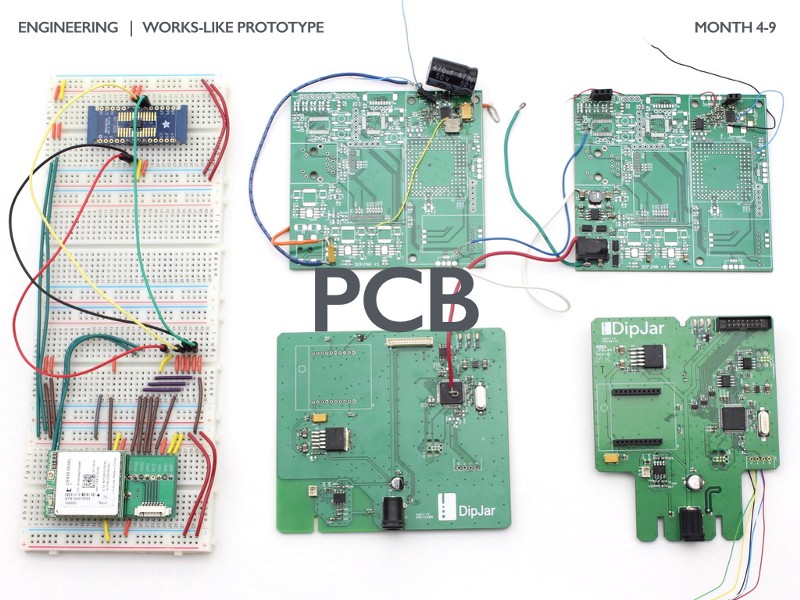
If your product has a printed circuit board (PCB) it often takes 5 to 10 revisions before it’s ready for mass production. The PCB development process begins with component selection, then moves to bread-boarding (on the left) and completes with a series of fabricated boards. DipJar iterated through 6 designs of their main PCB before the first production run at their CM.
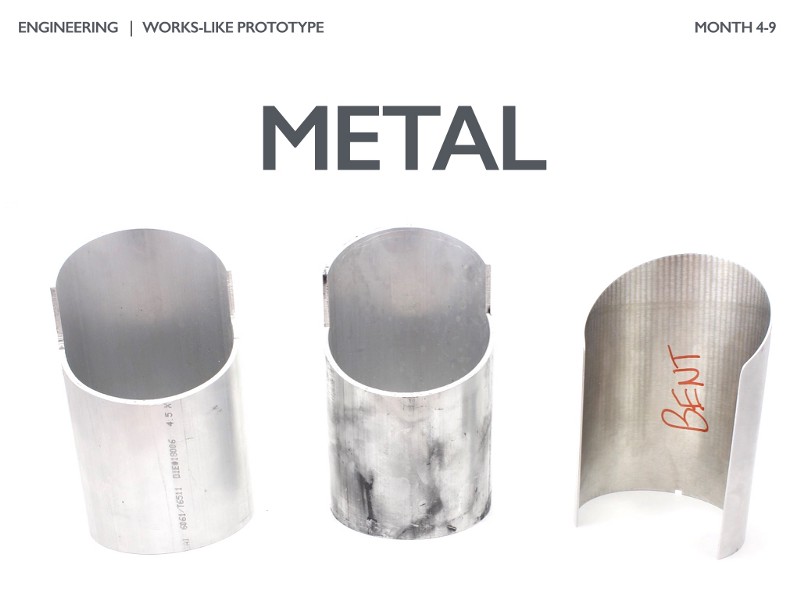
All of the components and PCBs need to be enclosed in something. If there’s metal involved in the enclosure, there is often a long development cycle. DipJar’s outer housing took a few months to get right.
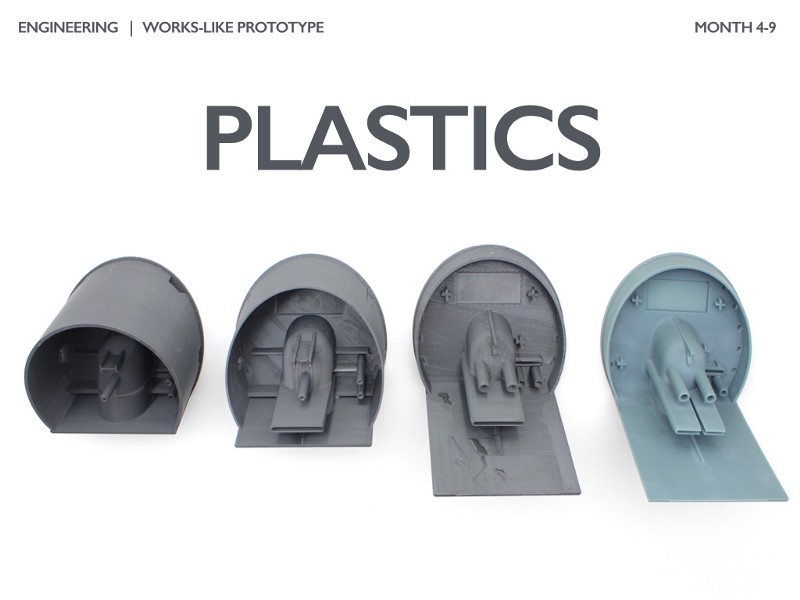
Nearly every product I’ve worked on has at least one plastic part. Molded plastic parts typically take 8–12 weeks to develop and tune so finalizing the design as soon as possible will relax your timeline. You can see the top frame of DipJar evolve from an extremely difficult part to mold on the left to the final production part on the right. Many features are optimized including: wall thicknesses, drafts, rounds, screw bosses, heat stakes, optics, finish texture, and structural integrity.
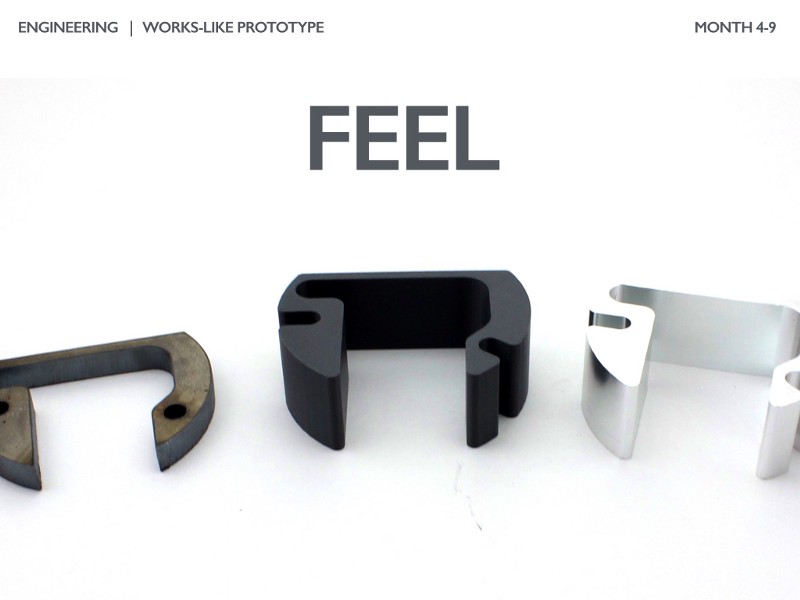
The “feel” of a product is also important. Many products use internal weights or thicker-than-necessary wall thicknesses to ensure the product feels the same way the eyes expect it to. DipJar has a relatively high center of gravity so the base is weighted with a laser-cut steel weight. On the second production run, the design was shifted to an extruded aluminum weight for cost reduction.
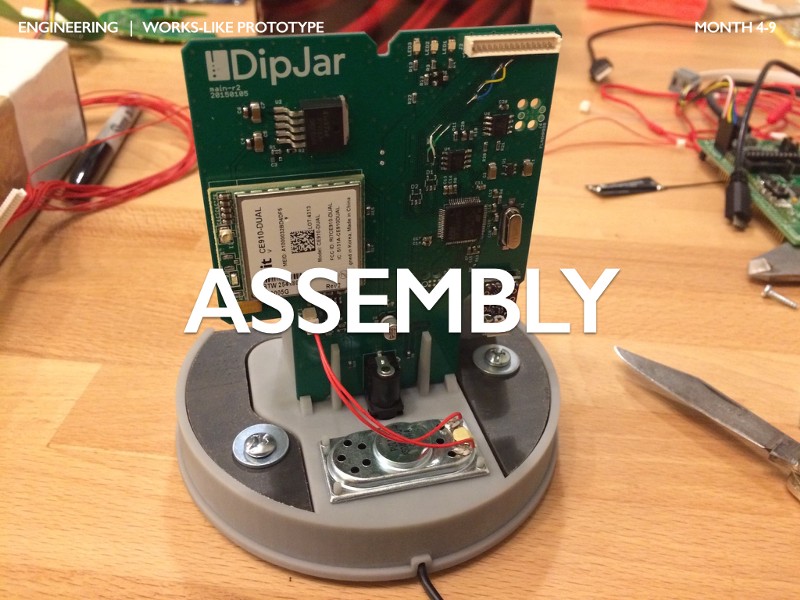
With each component selected, plastic part designed, and PCB revised, it’s important to ensure the product can be assembled. In the early stages of the works-like prototype, a binary “yes/no” is good enough. As the product gets closer to mass-production, looking at probable assembly failure points and cost/time optimizations becomes a focus. Assembly also includes designing things like cable harnesses, adhesives, fasteners, alignment/locator features, clearances, and tool accessibility.
Firmware and Software
Nearly all products we invest in at Bolt have both firmware and software. Unfortunately, this usually must happen after the prototype is built as the software depends on functioning hardware.
Electrical engineers (and embedded systems folks) have a wide variety of styles and development sequences when building firmware. We’ve found a “bottom up” approach to be most common.
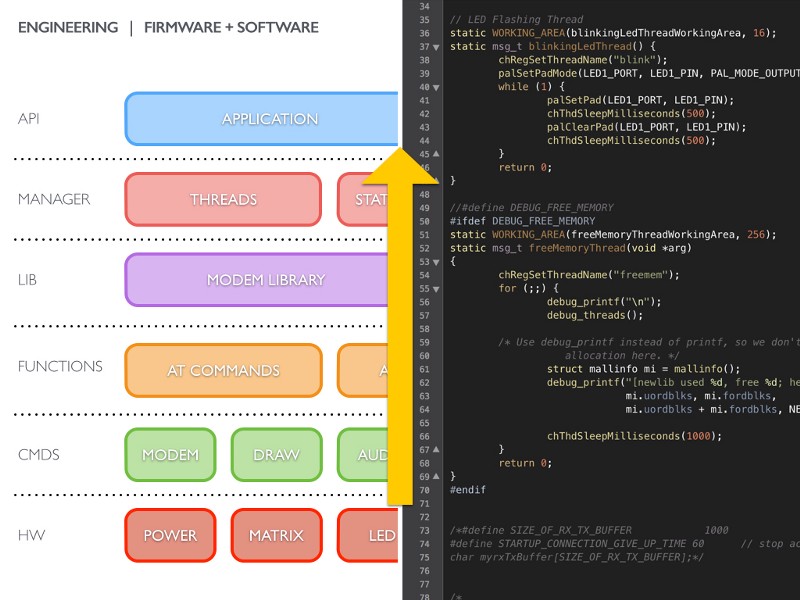
The process begins at the lowest possible level (hardware) and builds up to the web stack:
- Hardware test — building basic functions that test the hardware to ensure the PCB and schematic are designed correctly. Flashing test firmware, power cycling, blinking LEDs, powering-up radios, etc. This is often all that is needed to discover major problems with the first revision.
- Commands — testing each digital component (anything on the I2C, SPI, serial, USB, etc bus). This is a basic functional test to ensure components are responding with correct parameters.
- Functions — wrapping each set of commands and logic sequence in custom functions. In DipJar’s case, taking the input of a dollar amount and drawing it on the LED matrix is a critical function.
- Library — developing groups of functions that belong together and depend on each other. For example, all the display functions or all of the modem functions.
- Manager — many products are multi-threaded and getting each thread running reliably can be tricky. DipJar must be able to charge a credit card within a few seconds, which means it has one thread monitoring the cellular connection and one thread handling the display matrix and audio feedback.
- API/web — these threaded functions then communicate with various web services. Many products have two-way communication, such that the hardware can initiate requests to a server and the server can initiate requests to the hardware. Building an organized, rational API helps ensure communication is efficient and stable.
After the first works-like prototype is assembled for the first time, there are often many inadequacies. Sometimes the specification document had incomplete/incorrect requirements or components may not perform to spec. It’s common to build at least 3 or 4 full functional prototypes before feeling comfortable to move on to the final development phase.
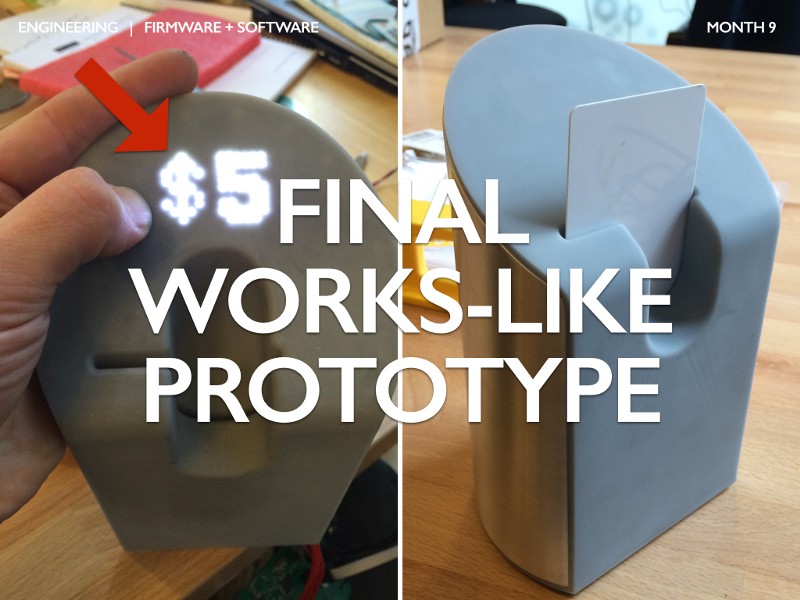
By the end of the works-like process, the prototype should validate the feasibility of building a reliable product at scale. You can see in the final works-like prototype above there are design details that haven’t been finalized (the red arrow pointing to blurry LED matrix, the gray color of the plastic, and larger than acceptable seams in the metal shroud) but this product successfully connects to the cellular network and can charge cards with a robust API.
Once the works-like prototype meets all requirements of the specification document it’s time to prepare for manufacturing. On to Part 4: Validation.
Ben Einstein was one of the founders of Bolt. You can find him on LinkedIn.
Bolt invests at the intersection of the digital and physical world.